Mirrors play a pivotal role in interior decor, adding a touch of elegance and practicality to any space. From bathrooms and bedrooms to living rooms and hallways, mirrors are versatile design elements that make a room feel brighter, more spacious, and aesthetically pleasing. Whether you’re a seasoned DIY enthusiast or just someone looking to spruce up their living space, knowing how to cut a mirror can be a valuable skill. In this guide, we’ll explore the art of cutting mirrors with ease, demystifying the process and equipping you with the know-how to tackle mirror DIY projects with confidence.
Why Cut a Mirror Yourself?
Before we dive into the techniques for cutting mirrors, it’s important to understand why you might want to tackle this DIY project yourself. There are several reasons to consider DIY mirror cutting:
- Customization: DIY mirror cutting allows you to create custom-sized mirrors to fit your specific needs and design preferences. This is especially useful when working with non-standard spaces or unique design concepts.
- Cost-Effective: Buying pre-cut mirrors from a store can be expensive, especially if you require a specific size or shape. By cutting your mirrors, you can save money and reduce waste.
- Creativity: Cutting your mirrors opens up a world of creative possibilities. You can create unique shapes, and intricate designs, or even combine multiple mirrors to make a statement piece.
- Empowerment: Learning to cut mirrors empowers you to take control of your home decor projects. You won’t have to rely on expensive professional services, and you can complete small mirror-cutting tasks with ease.
Safety First: Necessary Tools and Protective Gear
Before you start cutting a mirror, it’s crucial to gather the necessary tools and ensure you have the right safety gear on hand. Here’s what you’ll need:
- Safety Glasses: Always wear safety glasses to protect your eyes from any glass shards or splinters.
- Glass Cutter: The glass cutter is the primary tool for cutting mirrors. It has a small, sharp wheel that scores the glass, creating a breaking line.
- Straight Edge or Ruler: A straight edge or ruler helps you guide the glass cutter in a straight line, ensuring precise cuts.
- L-Square: An L-square can help you achieve right angles when cutting mirrors for rectangular or square shapes.
- Masking Tape: Use masking tape to mark the cut line on the mirror’s surface. This not only provides a visible guideline but also helps prevent splintering.
- Oil Lubricant: Some glass cutters require an oil lubricant to facilitate smooth cutting. Check your specific glass cutter’s instructions to see if oil is needed.
- Work Surface: Choose a clean, flat, and stable work surface to place the mirror for cutting. Ensure that it’s covered with a soft material, such as a towel or cardboard, to prevent the mirror from getting scratched.
- Gloves: While not always necessary, gloves can provide extra protection against sharp edges and glass splinters.
The Art of Scoring and Breaking: Step-by-Step Guide
Now that you have your tools and protective gear ready, it’s time to dive into the step-by-step process of cutting a mirror.
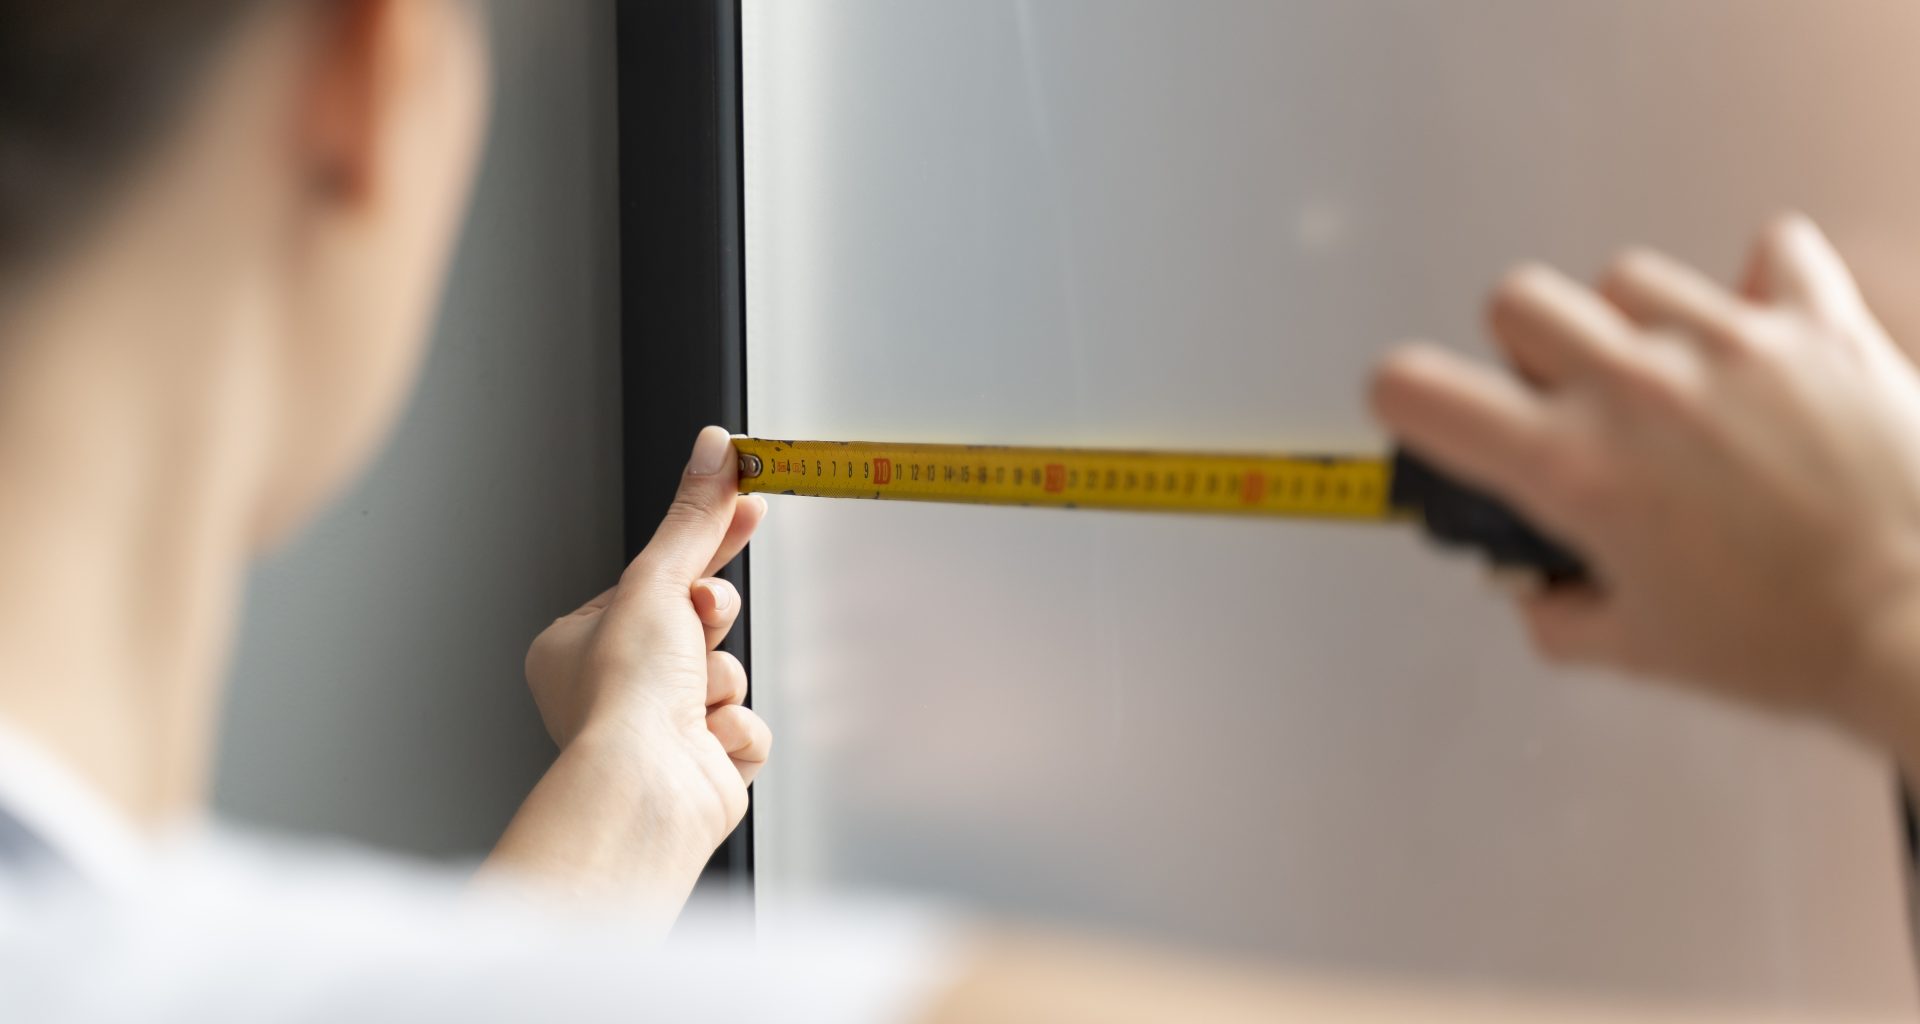
Step 1: Measure and Mark
Begin by measuring the dimensions you need for your mirror and mark these measurements on the mirror’s surface using a pencil or marker. For precise results, use an L-square or straight edge to create straight and accurate guidelines.
Step 2: Apply Masking Tape
Place masking tape along the marked line on the mirror. This tape will serve as a guide for your glass cutter and help prevent splintering. Make sure to apply the tape carefully, ensuring it adheres firmly to the mirror’s surface.
Step 3: Lubricate the Glass Cutter (If Necessary)
Some glass cutters require lubrication to function smoothly. Check the instructions for your specific glass cutter and, if needed, apply a small amount of oil to the wheel. This will help reduce friction as you score the mirror.
Step 4: Score the Mirror
Position your glass cutter at the beginning of the marked line and apply gentle pressure. You should hear a distinctive, scratching sound as the wheel scores the glass. Keep the glass cutter steady and apply even pressure as you run it along the guideline. It’s essential to make a single, continuous score for the best results.
Step 5: Break the Mirror
Once you’ve scored the mirror, it’s time to break it along the line. To do this, place the mirror on the edge of a flat surface, such as a table, with the scored line hanging slightly over the edge. Hold the mirror firmly on either side of the score, making sure your fingers are well clear of the breaking line.
Apply gentle pressure downward on one side of the score. The glass should cleanly break along the scored line. Be cautious and avoid applying excessive force, as this can result in uneven or jagged edges.
Step 6: Smooth the Edges
After breaking the mirror, you’ll likely have rough or jagged edges. To make the edges safe and aesthetically pleasing, use a glass file or sandpaper to smooth them carefully. Work your way around the entire cut edge until it’s smooth and free of any sharp points.
Step 7: Clean and Inspect
Finally, clean the mirror thoroughly to remove any debris, oil, or marks left during the cutting process. Inspect the mirror for any imperfections or chips. If necessary, you can use a glass cutter to trim and refine any areas that didn’t break perfectly along the score line.
Advanced Techniques for Special Shapes
While the basic steps described above are suitable for cutting rectangular or square mirrors, you may encounter scenarios where you need to cut more intricate shapes. Cutting circles or curves, for instance, requires a different approach. Here are some advanced techniques for special shapes:
- Cutting Curves: To cut curves, you’ll need a specialized tool called a glass cutter with a swivel head. This allows for greater flexibility in following curved lines. Score the curve gently, using consistent pressure, and then break the mirror as usual.
- Cutting Circles: For cutting perfect circles, you can create a circular template and attach it to the mirror’s surface using double-sided tape. Then, score the circle along the template’s edge and break the mirror. Sand the edges to achieve a smooth finish.
- Mosaic Patterns: When working on a mosaic project, cut small mirror tiles into the desired shapes using a glass cutter or mosaic glass nippers. The process is similar to cutting straight lines, but it requires more intricate and precise cutting.
Also Read: Tips To Make A DIY Epoxy Resin Coffee Table
Conclusion
Learning how to cut a mirror is a valuable DIY skill that can save you money and give you the flexibility to create custom mirror designs. While it may seem intimidating at first, with the right tools and a systematic approach, you can achieve professional-looking results with ease. Remember to prioritize safety by wearing protective gear and following the steps carefully, and you’ll soon be mastering the art of mirror cutting, transforming your living spaces with your custom creations. Happy DIY mirror cutting!